In this article down the page you can locate a lot of reliable resources around How to Fix Kitchen Faucet Leakage.
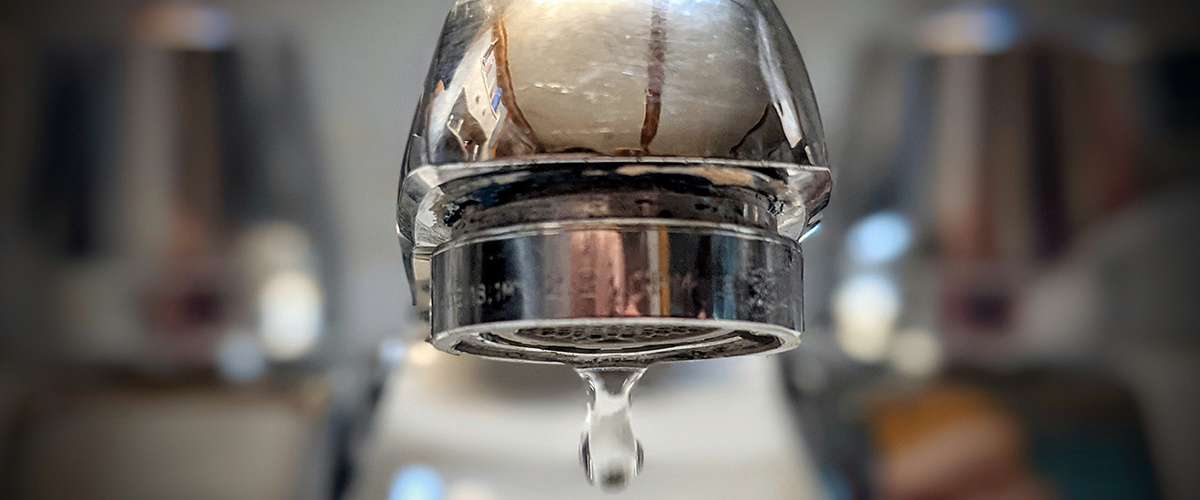
Is your faucet dripping or trickling? Drip, drip, drip! It's really simple to fix a leaky faucet by following this mini-guide.
Prep Your Tools for Repairing
You can currently have the devices tucked away in your tool kit if you're a handyman. Need to you miss out on some tools, you can readily buy these in any hardware store. You will need the following:
Turn Off Your Supply Of Water
Before you attempt to fix your leaking faucet, you must turn off that water supply that feeds it fresh water. Should you forget to do this, you will encounter a huge mess, deal with water damage, and cleanup. There's no demand to touch the mainline to make sure that other individuals can utilize the water in various other parts of that home. You can typically find the regional valve in a neighboring closet or under the sink. Normally, there are 2 shutoffs, one for the cool and also the various other for the hot water supply. Turn them both off by transforming the handle counterclockwise. Determine that water is cut by switching on the tap.
Secure the Deal With Knob
As soon as all the water is reduced, you can proceed with getting rid of the ornamental cap off the handle knob using your flat head screwdriver. As soon as the cap is off, you will see a tiny screw that secures the take care of to the stem of the faucet. Eliminate this screw with your Phillip's screwdriver Contact Us Now so you can tear the handle from the stem.
Get Rid Of the Faucet Stem
Obtain your adjustable C-wrench for loosening the packaging nut. This will reveal the stem. Relying on your tap configuration, the stem will conveniently bulge, or you will need to turn it off the valve. As soon as the stem is eliminated, check the components for deterioration.
Replace the Rubber Bands
From there, you have to replace the washer, which is generally found in the bottom of the stem within the shutoff seat. It would certainly be best to replace both to ensure that the leaking quits. Or else, you will still hear the drips.
Return the Tap in Place
As soon as you've replaced the washer as well as O-ring, you need to rebuild the tap by adhering to the reverse order of elimination. When it's back in place, test it out by turning on the water supply as well as faucet.
Is your tap leaking or dripping? Drip, drip, drip! Prior to you attempt to fix your leaking faucet, you should turn off Learn More that water supply that feeds it fresh water. It would be best to replace both to make sure that the leaking stops. Otherwise, you will still hear the drips.
HOW TO FIX A LEAKY TUB FAUCET
TURN OFF THE WATER SUPPLY
First things first! If you don’t want to spray yourself while removing the faucet, then you’re going to have to shut the water supply off.
Turning off the water supply for the tub faucet alone may be an option if you are aware of the location of the valve. If not, the water supply for the whole house can be shut off by finding the lever near your water meter.
After you have done this, open the faucets tap to drain any excess water.
REMOVE THE FAUCET CAP
Removing the faucet cap will allow you access to the faucet handle screw. To do this, use a flat edge, like a flathead screwdriver or pocket knife to pop the cap out and then put it somewhere safe as you continue your repair.
REMOVE THE HANDLE SCREW
From here, you should be able to see a screw that the cap was concealing. Find an appropriately sized screwdriver and remove the screw.
It is recommended to put your tub stopper in at this point to avoid losing the screw down the drain. Once the screw is removed, put it somewhere safe.
TAKE OFF THE HANDLE
Removing the handle will hopefully be as easy as it sounds. In a perfect world, the handle should slide right off, but if the installation is an older one, the handle may be fused to the stem due to water deposits or corrosion.
In the case that you do have difficulty, don’t try to force the hand;e off, instead try pouring boiling water over the handle to loosen it. If this doesn’t work, you may need to acquire a handle puller, a tool designed specifically for this situation.
REMOVE THE ESCUTCHEON
Removing the escutcheon should also be a simple step. Most escutcheons can either be removed by unscrewing it. If there is no screw, you should be able to twist it off.
REMOVE THE STEM ASSEMBLY
Now that the handle and the escutcheon are removed, you should have clear access to the stem assembly. This part is most likely the source of your leak problem. An adjustable wrench should work just fine for removing the stem assembly.
INSPECT THE WASHER
The most simple explanation for your leaky faucet is a bad washer. The washer is located at the end of the stem assembly. If it looks warped or brittle, then it can safely be assumed that it needs replacement. Replacing this should solve the leak.
REPLACE THE WASHER
If you have a correctly sized washer on-hand, then go ahead and switch the old washer out with the new one. Unscrew the screw holding the washer in place, switch the washers, and replace the screw.
If you don’t have a washer on hand, a new one can be purchased at a hardware store. Taking the old washer with you will allow the hardware store staff to help you find the replacement you need.
PUT THE FAUCET BACK TOGETHER
After you have replaced the washer and confirmed that the seat has no damage, you can put the faucet back together again.
First, put the assembly back in place and tighten it with a wrench. Then put the escutcheon back on, and then the handle, handle screw, and handle screw cap.
Now you can turn the water back on and test if the leak has been fixed! If the leak is gone, then congratulations! Now you know how to fix a leaky tub faucet.
https://www.kingstonbrass.com/blog/how-to-fix-a-leaky-tub-faucet/

I am just very intrigued by How to Fix Kitchen Faucet Leakage and I am hoping you appreciated the new blog entry. If you liked our article kindly be sure to pass it around. Many thanks for your time. Please come visit our website back soon.